The Provident Homemaker
  • Recipes and Info
    • Making Bread
  • My Blog
  • Favorite Resources
  • Documents and Files
  • 52 Weeks of Building Storage

Meal Ideas for Menu Planning

3/28/2020

0 Comments

 
Picture
 Easy everyday main dishes or meals—ideas for your 3 month supply menus

Here is a menu plan for my family
​
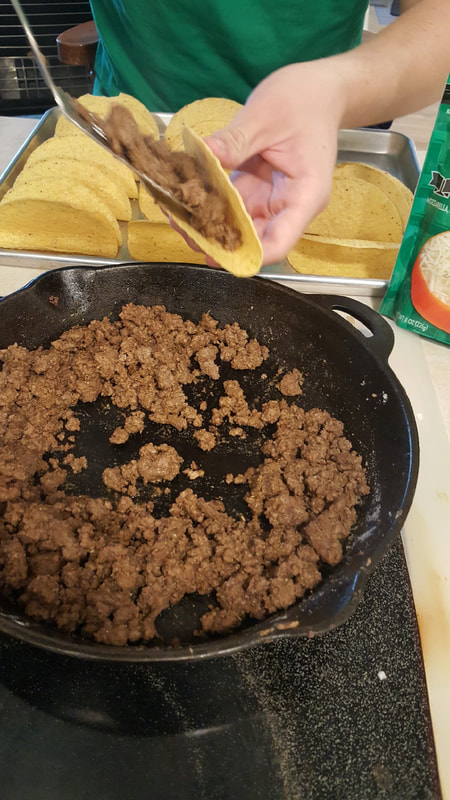
Taco Soup  (Homemade Taco Seasoning here)                                         
Spaghetti
"Leftovers" Soup 

Baked Potato with Broccoli and Cheese 
Hawaiian Haystacks  
Pigs in a Blanket (hotdogs baked inside of bread dough or biscuit dough)                                    
Chicken Nuggets (or fish sticks) and French Fries
Orange Chicken (or cauliflower) and rice                               
BBQ Chicken and rice pilaf or biscuits
Pot Pies- made with canned biscuit dough   
Chicken Noodle Soup
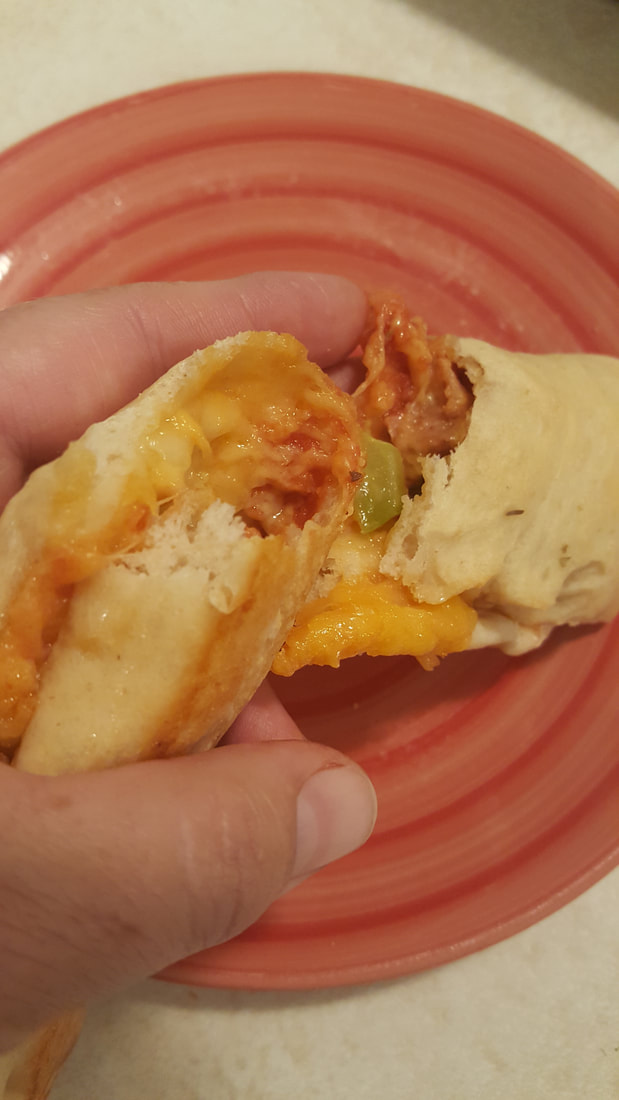
Pizza Pockets (Homemade version here)
Taco Salad   
Tacos- beef, fish, chicken, shredded pork, or shrimp
Tamale Pies (mini)   
Mango-Berry Salad, with a sandwich if needed
​Swiss Steak and Tomato Gravy over rice
Hamburgers
Tuna Burgers
Bean Burgers
Red Beans and Rice   
Crockpot (or Instant Pot) Rosemary Pork Roast and Vegetables                
Grilled Cheese sandwiches with Tomato Soup
Spanish Rice with chopped meat stirred in   
Chef Salad with homemade croutons
Chicken Caesar Salad
Sweet Potato Curry with Turkey/Chicken
Ramen       
Ramen-Chicken/Turkey Salad         
​Weeknight BBQ Beef                                          
Individual pizzas- on tortillas or English muffins
​Pizza on Zucchini Crust 
Quesadillas- beans inside or to the side       
French bread pizzas- split lengthwise, add toppings
Chicken Strips and rice or tator tots              
Canned soup with bread and butter
Macaroni and cheese 
Fend for Yourself Night    
Beans, warm homemade bread, cottage cheese, and tomatoes or salsa (sounds weird, but it was my mom's staple on bread baking day)    
Black Beans and Southwestern Zucchini Cakes                           
Breakfast for dinner:
   French Toast                                            
   Pancakes or Waffles with fruit puree or jam
   V8 and nuts and toast                                                
   Hardboiled or scrambled eggs with muffins
   Eggs with fried potatoes or hashbrowns                                                   Muffins and yogurt, cut fruit
   Omelet
   Frittata
   Sausage and Gravy (or sausage gravy!) over Biscuits
   Fruit and Yogurt Parfaits
   German Pancake (try this microwaved version)
Curry over rice
theprovidenthomemaker.com/my-blog/two-minute-egg-and-cheese-breakfast-sandwichBurritos
Enchiladas
Chicken and Ramen salad 
Cheesy drop biscuits and soup                                 
Navajo Tacos    
Spanish Rice – add diced meat or cheese               
Clean out the Fridge night                             
Ham or Spam Fried Rice                               
Sour Cream Chicken Enchiladas
Vegetable Fried Rice                                     
Potato Bar (clean out the fridge for toppings)
Goldenrod Eggs                                             
Meatloaf and baked potatoes
Chicken Gravy over Rice     
​Egg Toast                         
Bread in Milk (basically Egg Toast without the eggs)
Beef stroganoff over noodles                         
Lentil Soup
13-Bean Soup                                                
White Chicken Chili
Chili                                                                
Two-Minute Egg and Cheese Sandwich  
Tuna sandwiches
Chicken salad sandwiches                            
Egg salad sandwiches
Potato salad with eggs, cheese, ham           
Crab salad on bread or lettuce leaves
Teriyaki stir-fried vegetables over rice          
Porcupine Meatballs (made from rice and hamburger, not porcupine!)
 
What else should I add? 
0 Comments

Week 27- Beginning a Year's Supply, Recipe for Old-Fashioned Egg Toast

10/12/2019

0 Comments

 
We're on to the next phase of the 52 weeks of building your food storage!  The next 26 weeks we'll focus on getting and storing basic foods that last a long time.  These include wheat and other grains, beans and other legumes, powdered milk (if you're not allergic), cooking oils and other fats, salt, and sugar.  Click here for a list of how much of each you will be aiming for per person, and what foods work in each category. Did you know that you can store less when children at home are small?  It makes sense, right?  Quantities for them are listed on the link, too.
​
Your assignment this week-- Buy all the salt you'll need, according to that list.

​See how easy that was?
Picture
This is an inexpensive, filling, easy, pioneer-era recipe.  It makes a great breakfast, or a lighter late supper.   And it's much cheaper than eating cold cereal for breakfast-- especially if you make your own bread-- so you'll have some budget money left over for your other foods.

Poach an egg in a little milk. (See below for instructions.) Meanwhile, toast two or three slices of bread.  Put the egg into a cereal bowl (save the milk), and chop up the egg.  Tear one or two slices of the toast into 1/2 - 1" pieces and put on top of the egg.  Pour the hot milk over all.  Add a nice big dab of butter on top, sprinkle with salt and pepper.  Stir a little bit, serve with the last slice of toast.

Poaching is essentially hardboiling an egg, but doing this after taking it out of the shell.  Eggs can be poached in water, milk, broth, or soup. In this recipe, we use milk because it's part of the finished dish.

Poaching option one:  Microwave.  
Fill a mug 1/2 to 3/4 full with milk.  Crack an egg into it, poke the yolk so it breaks (so it won't explode during cooking).  Microwave just until the egg is firm.  Let it rest a couple minutes while you make the toast. 
When I used 1/2 c. milk and 1 large egg, it was done enough in 1 minute 20 seconds.  The times I tried cooking longer than that, the milk bubbled out of the mug and went all over.  The white was a little bit jelly-ish on the outside, but after sitting for a couple of minutes in the hot milk, everything firmed up, and the yolk was perfectly cooked.

Poaching option two: Stovetop.  
Pour 3/4-1 c. milk in a small saucepan and heat to a simmer over medium-high heat.  Once simmering, crack an egg and gently slide it into the milk by tipping the shell right next to the milk.  Cook until as firm as you like, about 2-4 minutes.
Picture
Picture
Picture
0 Comments

Week 21- Making Your Own Taco Seasoning, Weekly Assignment

9/1/2019

0 Comments

 
Picture
Weekly Assignment:   B4-3- This is the last week of doing this for your 3-month food supply items! Next week you’ll start ‘B4-3’ with your nonfood items like hand soap, laundry soap, and toilet paper.

Why spend extra on pre-made seasoning packets when you likely already have all the ingredients? Save some money by making your own seasoning packets, or adding the spices directly to your meat.

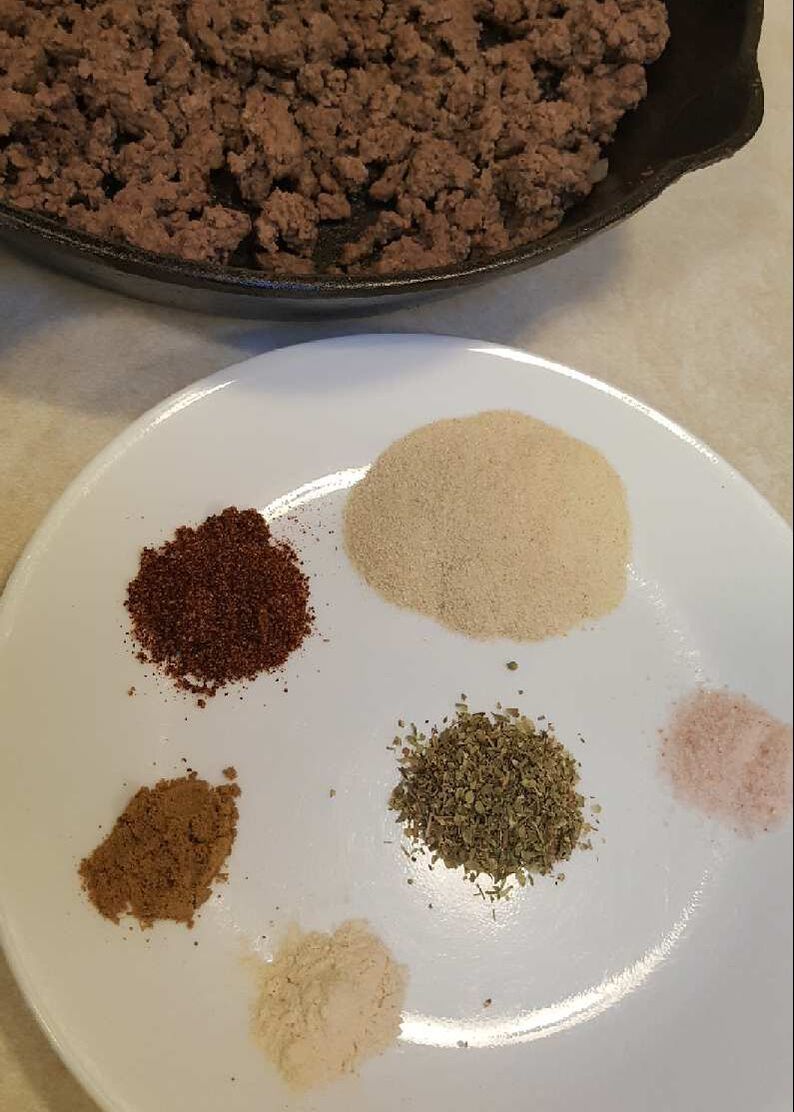
Taco Seasoning
2 Tbsp. dried onion
1 tsp. oregano
1½ tsp. chili powder
½ tsp. garlic powder
½ tsp. cumin
½ tsp. salt

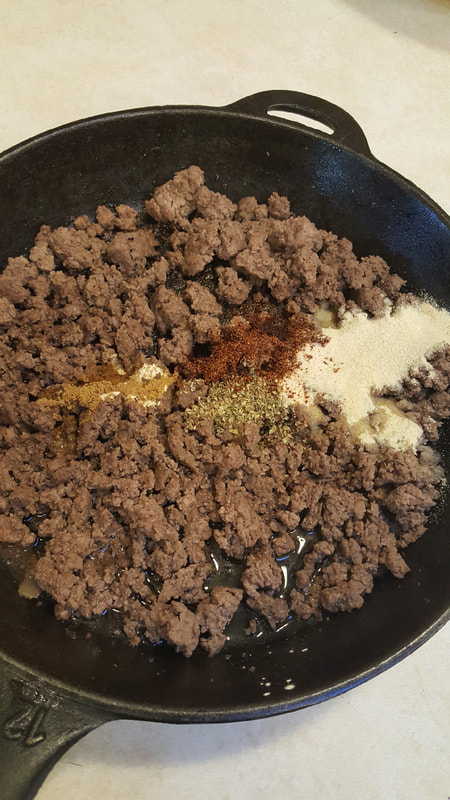
This is enough seasoning for 1 pound of ground beef or turkey, or a pound of freshly cooked pinto or black beans.  Cook the meat until browned, add the seasonings and ½ c. water or 8 oz tomato sauce; simmer for a few minutes until it’s the consistency you like. Want to make your meat go further?  Add any of these: 1 cup of cooked rice, a handful of quick-cooking oats and a bit of extra water (or 1/4 c to 1 c. leftover cooked plain oatmeal), a can of beans (drained), 1/2- 1 c. shredded vegetable like carrot or zucchini, 1-2 c. cooked cracked wheat.

The seasoning can be adjusted to your own tastes; if you like cumin, up to 1½ tsp. can be good.  I’ve also seen people add crushed red pepper or cayenne pepper, black pepper, smoked paprika, and a couple tablespoons of brown sugar.  What if you overdo the spices?  See how to fix that, here.  

Something to know about chili powder is that there are two general kinds-- the first is nothing but powdered chili peppers, with a huge range of heat, depending on the type of pepper used. (If it's a spicy one, 1 1/2 tsp. of this in your recipe will likely be too much!)   The second kind of chili powder is a mixture of spices-- including powdered chili peppers- but also including things like cumin, oregano, garlic, salt, and more.  Check the label of your spice bottle to see what yours is made of; if it has salt, you may need to reduce the separate amount of salt. If it doesn't have salt, you may want to add 3/4 tsp instead of 1/2 tsp.

Multi-batch Taco Seasoning (some for now, some for later)
½ c. dried onion
1 Tbsp + 1 tsp oregano
2 Tbsp. chili powder
2 tsp. garlic powder
2 tsp. cumin
2 tsp. salt (use 1 Tbsp if your chili powder doesn’t contain salt)
 
Stir together in a small bowl.  You can keep the whole batch in a glass spice jar and use 3 Tbsp each time you cook 1 lb of burger for tacos, or store single-use quantities in snack-size ziptop bags.  For single use size, divide into four roughly equal portions.  Put each one in a small ziptop bag or other airtight container.  Label, date, and store in the cupboard or freezer.
 
Store in a dark cupboard or in your freezer.

You can even add tomato powder (see here how to make it and how to use it in your recipes)


Use this mix in taco salad, soups (1 batch of seasoning for 1-2 quarts of liquid), salad dressings, dips, Mexican dishes, as a rub for meat, on kebabs, and of course for tacos. (Add 1 tsp seasoning mix to one drained can of beans.)

Want to make more home-seasoned basics?  


Marinara sauce
​

BBQ sauce

Or maybe you're needing ways to use all the tomatoes your garden is producing:

https://theprovidenthomemaker.com/my-blog/category/tomatoes
Picture
Picture
0 Comments

Week 12- Homemade Pizza Pockets

6/29/2019

0 Comments

 
Picture

Week 12 assignment-- Going off your  Inventory Shopping List and this week’s sales, buy the 3 months’ worth of as many different items as you can (= Buy For 3) as your new budget allows.    You'll do this through Week 21.

Have you ever made pizza from scratch?  It's delicious. To get directions on making pizza, go to the basic bread recipe, and scroll down until you see “Pizza”.  Directions are there, including for making enough of a super-simple red sauce for your pizza.  You'll want the sauce for pizza pockets, too.

Pizza pockets are fun, portable, completely customizable, AND they freeze well.  You can make them to suit food allergies; nondairy cheese can be used in these if you like. This recipe can be doubled, tripled, quadrupled  make whatever quantity you want to make for dinner plus extras for packable lunches. 

To make 8 regular pizza pockets or 6 large ones, you'll need:

-One loaf’s worth of bread dough

-8 oz. shredded cheese

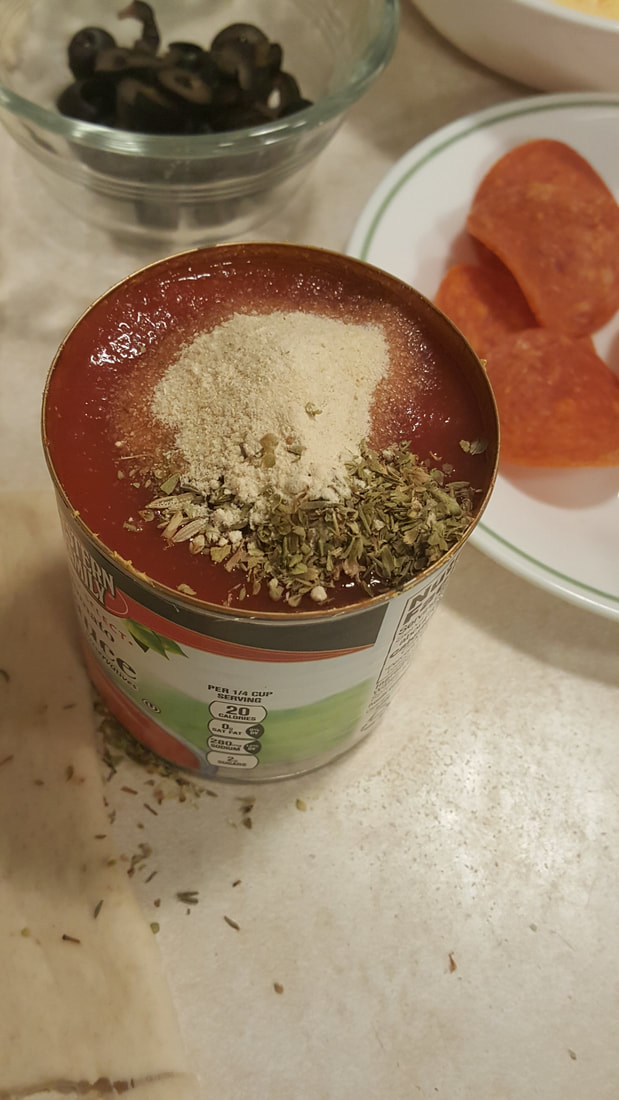
-One 8-oz. can of tomato sauce (you'll only use half)

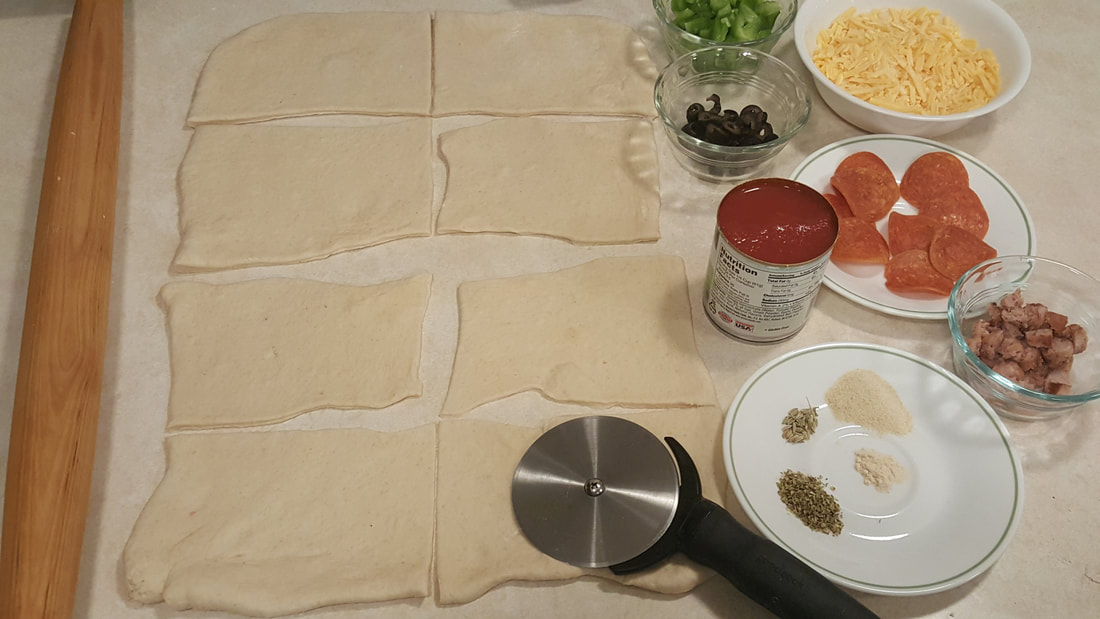
-Dried or fresh herbs- oregano, basil, thyme, garlic powder, onion powder, ground black pepper, rosemary, fennel (use whatever you have and like.  I often use only oregano, garlic and onion powder)

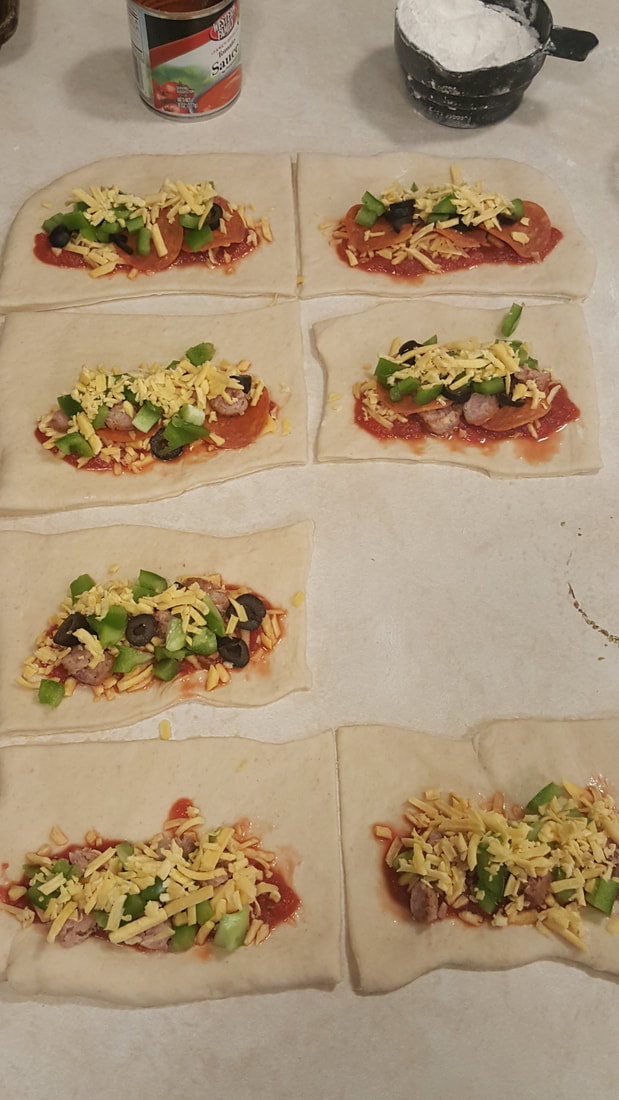
-Toppings-- crumbled bacon, pepperoni, cooked sausage, leftover chopped cooked chicken or hamburger, mushrooms, zucchini (shredded and squeezed dry), chopped bell peppers, spinach leaves, diced tomato, olives… Plan on ¼- ½ c. of each topping, for each 8 pockets you make.
 
Roll dough out as you would for pizza crust, a rectangle about 8x15”.  While the dough relaxes after rolling, pull out your sauce, cheese, and other toppings.  Oil a 12x18" baking sheet, sprinkle with cornmeal for extra crunch, OR line with parchment. After your toppings are ready, roll the dough larger, to make it measure about 13x19". 

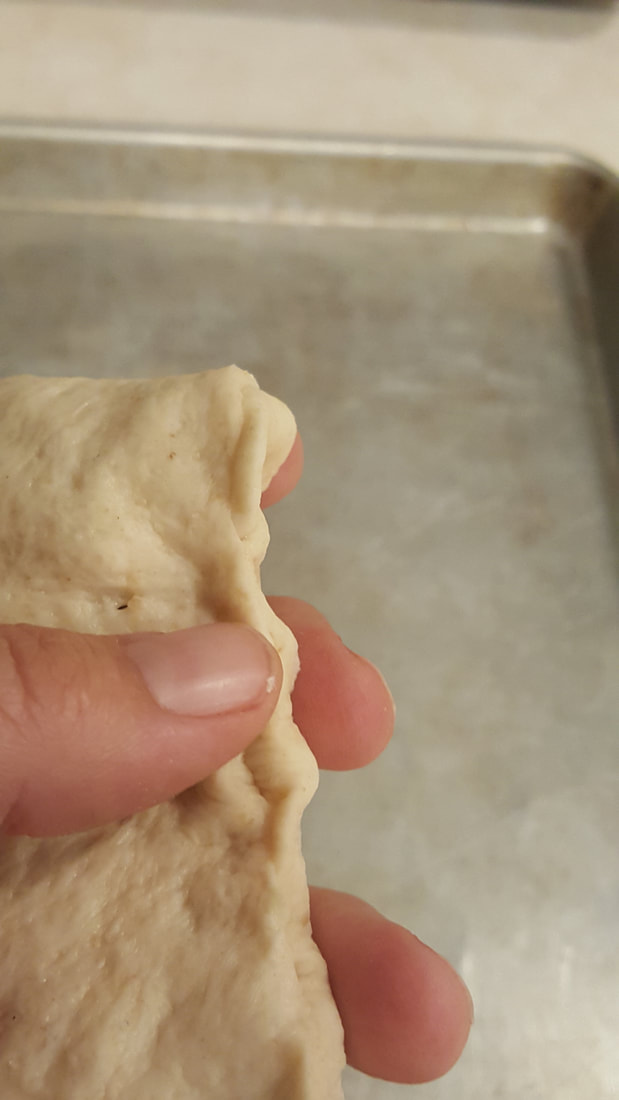
With a pizza cutter or knife, cut the rolled dough down the center the long way, then in fourths the other direction. (See photo, below.) This will give you eight rectangles, each about 4x6”.

Picture
Picture
Spread pizza sauce on one long side of each rectangle, leaving a 1” clean border around those edges. Sprinkle with any toppings and about 2 Tbsp. of cheese. Brush the edges of the bare half with water; this will help the pockets seal better around the edges after crimping.

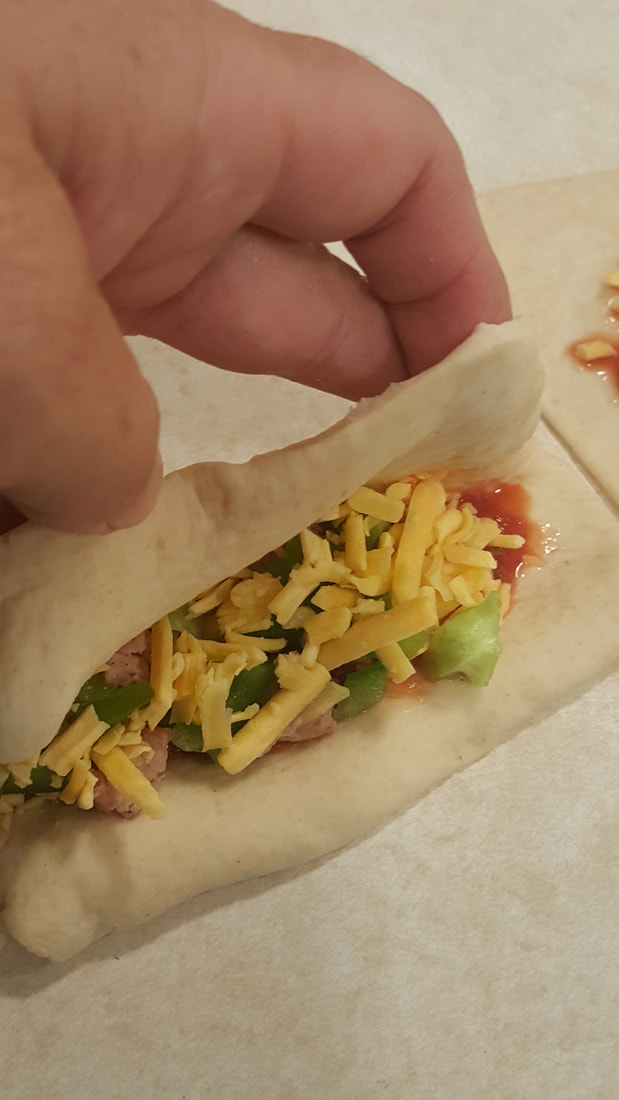
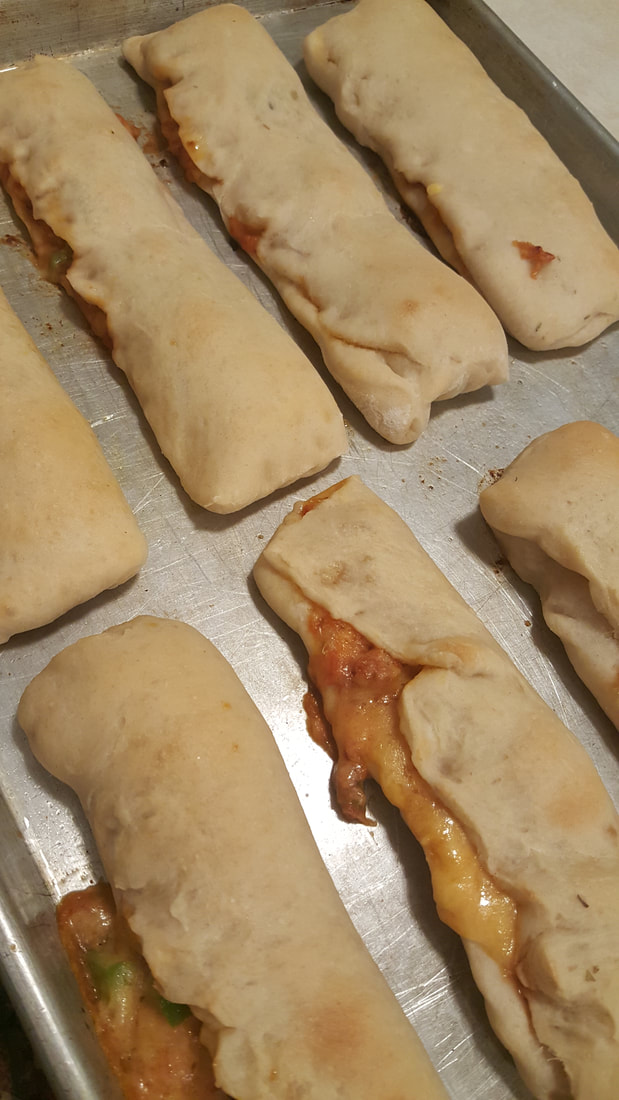
Fold each pocket in half the long way, lining up edges.  Crimp (pinch) the edges with your fingers or by flattening with the tines of a fork.  Set on the oiled baking sheet. Cover with a kitchen towel and let rise for 15 minutes. While they rise, preheat the oven to 400° F.  Remove the kitchen towel. 

For shiny rolls, brush with beaten egg (whites, yolks, or both) before baking, or brush with milk or butter for better browning. Bake about 20 minutes, or until browned on the bottom. Remove to a cooling rack.  Let cool at least 10 minutes before eating; they continue baking internally in those first several minutes. 


Refrigerate or freeze any that you didn't eat right away.

If you’re going to freeze them, first cool them completely.  Freeze them on a baking sheet, and then transfer to a ziptop freezer bag, labeled and dated.

Picture
Picture
Picture
Picture
Picture
0 Comments

Creamy High-Protein Pasta, Dairy Free

3/23/2015

2 Comments

 
Picture
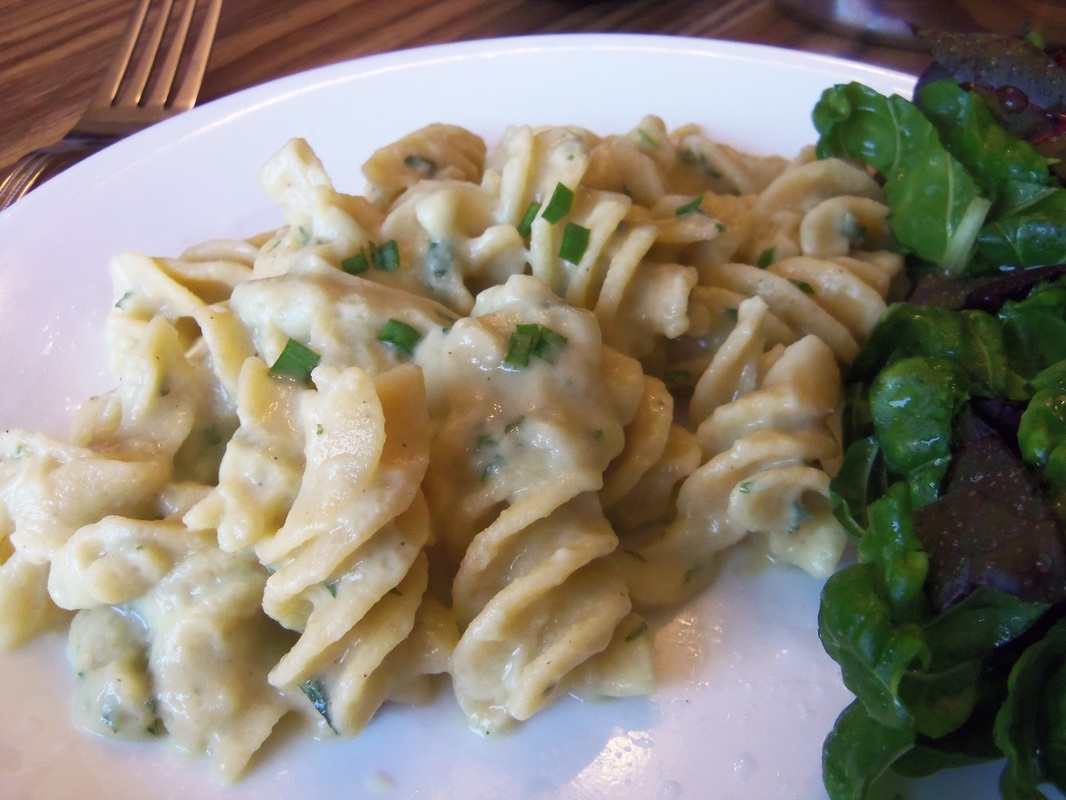
This is meat-free, dairy-free, and in the photo above, also made using gluten-free pasta.  Its rich and creamy taste would never make you suspect there are so many 'normal' ingredients missing.  You will not taste the avocado, and surprisingly, it doesn't even make the sauce look green.  It adds richness along with those healthy, satisfying fats.  
If you used canned chickpeas, you'll have about one cup extra; you can either stir those in with the pasta, or save them for another use.
If you don't have an avocado, or don't want to use one, omit it and increase the chickpeas to three cups instead.

12-16 oz. pasta, cooked according to directions; save the cooking water
1 Tbsp. olive oil
3 cloves garlic, minced
2 cups cooked chickpeas- or use 2 cups from two (14-oz) cans, drained
one 6" sprig fresh rosemary, or 1-2 tsp. dried rosemary
1/4 tsp. red pepper flakes
1 medium avocado, peel and pit removed
1 Tbsp. lemon juice
salt and freshly ground black pepper to taste
1/4 c. chopped fresh parsley, or 1 1/2 Tbsp. dried parsley

While the pasta is cooking, heat 1 Tbsp. olive oil in a small skillet over medium-high heat. Add the garlic; cook and stir 2-3 minutes or until fragrant.

In a blender, combine 3 cups of the pasta cooking water (may also use the water drained off the cans of chickpeas), chickpeas, rosemary, red pepper, avocado, and lemon juice.  Blend on high until smooth.  Add salt and pepper to taste (start with 1/2 tsp. salt), and stir in parsley.  
Pour over pasta and toss to coat.  
If the sauce is too thick, add water 1 Tbsp. at a time until it's the consistency you like.  


2 Comments

Roasted Cauliflower and Chicken

1/16/2014

0 Comments

 
Picture
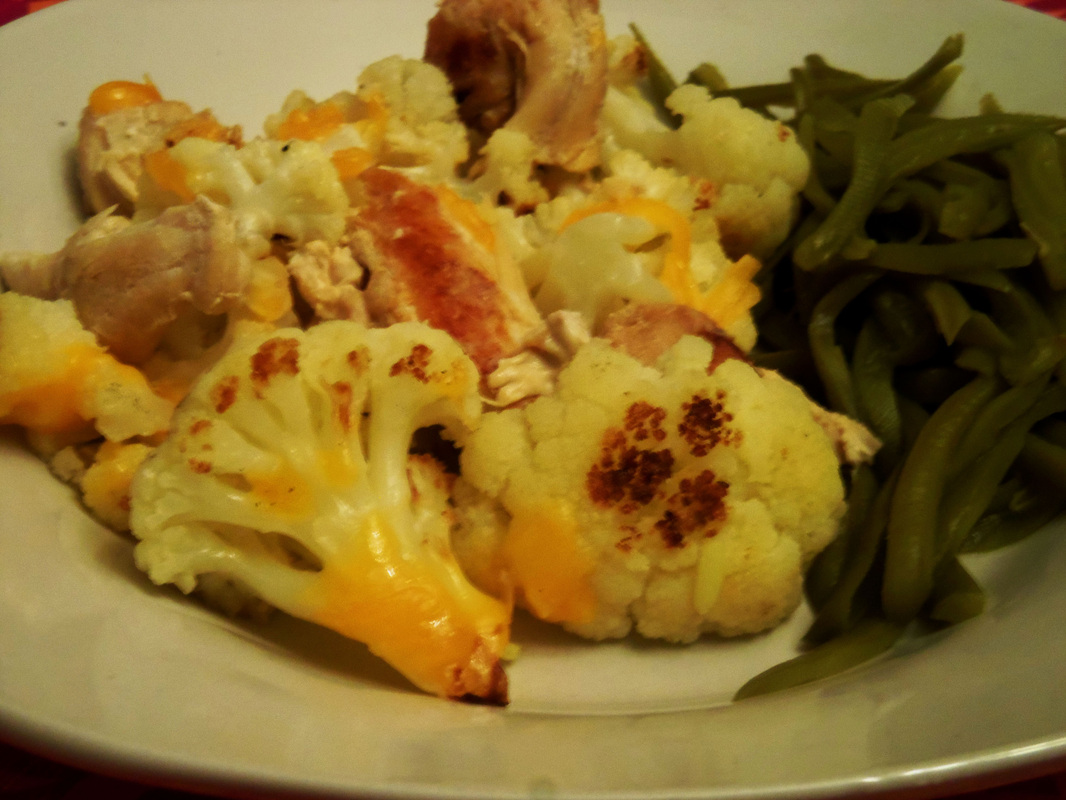
We discovered roasting vegetables about three years ago.  Now when I buy broccoli or cauliflower, they are almost always served roasted.  Even my kids who  "don't prefer"  (the PC term at our table) broccoli, like it roasted. 

 Roasted Cauliflower and Chicken    - serves 6-8
1 head cauliflower, cut into florets
1-2 Tbsp. olive oil
1/2 tsp. salt
2 cups cooked chicken 

Preheat oven to 475, adjust the oven rack to the lowest position about 20 minutes.  Put the cauliflower on a baking sheet, drizzle with oil, then sprinkle with salt.  Roast about 20 minutes, stirring once about after about 15 minutes.  Cauliflower is done when parts of it turn a deep golden brown.  Stir in the chicken .

 We ate this with rice and chicken gravy (see below) on the side; conveniently enough, it also takes about the same amount of time to cook.  If you start the rice first, then cut up the cauliflower, the rice should be done about the same time if you're using regular white rice and cooking on a stove top.

Since I didn't have any leftover chicken,  I put 1 lb of chicken in my pressure cooker along with two medium-small onions (or use one med-large) and about 1/2 tsp. salt.  My pressure cooker does not lose water when it cooks, so I didn't add any.  (If your pressure cooker does, please add water!  Probably 1/2 cup, as the chicken and onions release moisture as they cook.)  It was done after 15 minutes of high pressure. 

Clear Chicken Gravy
1 Tbsp. water
1 Tbsp. cornstarch
1 cup juices from cooking the chicken and onion

(microwave instructions)  
In a  1-cup glass measuring cup, stir together the water and cornstarch until smooth.  Stir in a little of the cooking juices, then stir in enough that you have 1 cup total.  Microwave for 1 minute; stir.  If it hasn't thickened yet, microwave another minute and stir again.  Add salt if needed.  (Mine didn't need it.)

0 Comments

Honey-orange dressing

12/7/2013

0 Comments

 
Picture

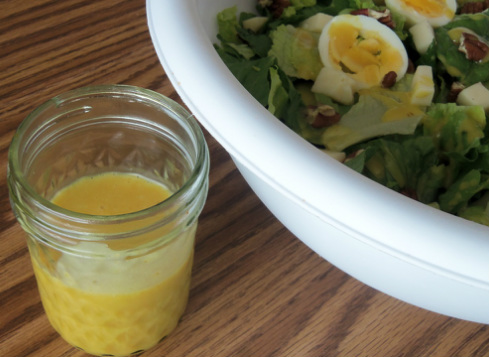
Yesterday I got to have lunch with some friends at a neighbor's house.  We each brought something; Emily, whose house we met at, made Apple Butternut Squash Soup; this link goes to the recipe on her website.

I had lots and lots of Romaine lettuce on hand, thanks to another friend...  so a salad seemed in order.  I started out intending to make honey-mustard dressing, but it lacked something... so I looked around the kitchen to see what to use.  In went some orange peel and the white parts of some green onions.  

Oh.

That was good!

Next about a pound of lettuce and the green parts of three green onions were mixed with around half of the dressing; just enough]to lightly coat.  Then four or five sliced hardboiled eggs went on top, 4 oz. of cubed cheese, and a big handful of toasted pecan pieces.  
Everyone loved it, except the person who didn't try it because she's allergic to eggs and nuts. :/

This would be delicious brushed onto chicken a few minutes before done baking.

Honey-Orange Dressing  Makes about 1 cup

1/4-1/3 c. honey (depends if you want this more sweet or more tangy)
1/4 c. apple cider vinegar
1/4 c. olive oil
1 tsp. prepared mustard
1/4 tsp. salt
1/4 tsp. pepper (I used 2 drops of essential oil)
2 Tbsp. onion (I used the bottom 1 1/2" from 3 green onions)
1 1/2 tsp. orange zest (I used about half the peel from a clementine)

Throw everything into a blender; puree until smooth.  


0 Comments

Turkey Ramen Cabbage Salad

11/30/2013

0 Comments

 
Picture
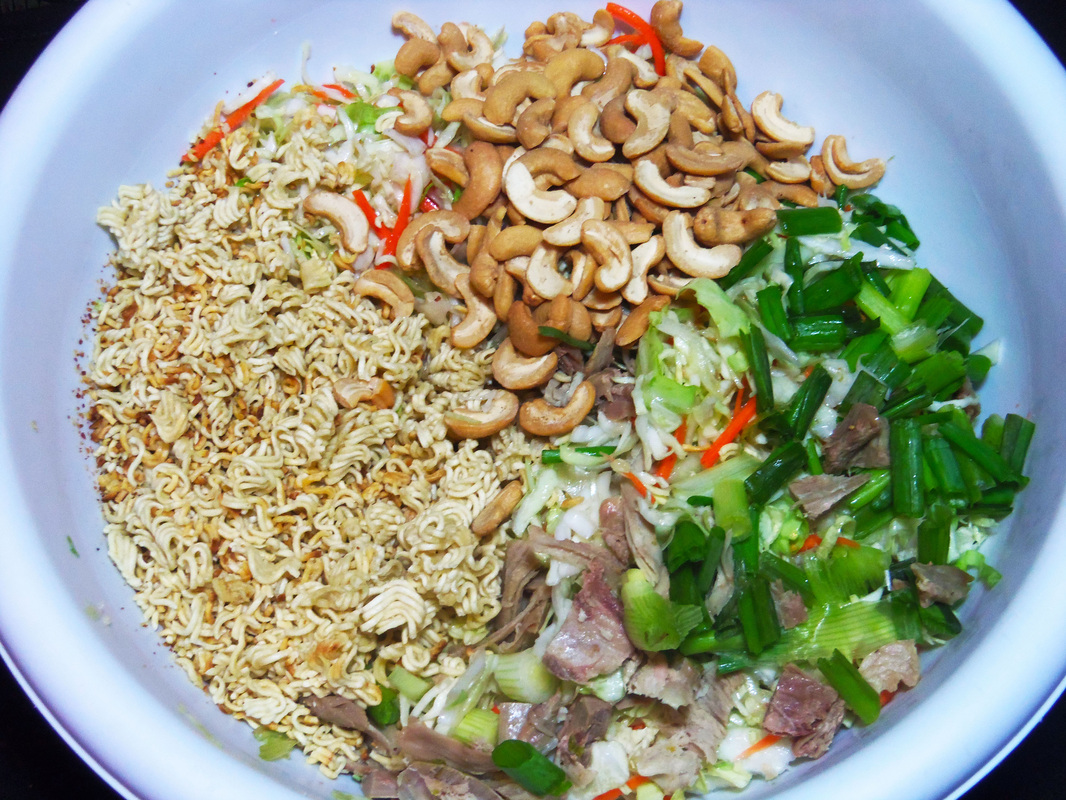
Most salads like this use so much dressing that there's a pool of it at the bottom of the bowl.  And the dressing is about all you taste.  
Not this one.  There's enough oil in the salad to help you unlock those fat-soluble vitamins; both cabbage and cashews are very high in Vitamin K.  And you can actually taste the cabbage, in a way that accents only its best features.  

If you have any left over, even though the noodles will not stay crunchy by the next day, the cabbage does.

Cabbage Ramen Salad        Serves 4-6.  Or two who really, really like it.

1 tsp. olive oil
1 package Ramen noodles
2 Tbsp. olive oil
1 Tbsp. rice wine vinegar or apple cider vinegar
1 Tbsp. honey or sugar
1/2 tsp. salt
1/4 - 1/2 tsp. black pepper
1/2 tsp. ginger OR 1 1/2 tsp. chopped crystallized ginger OR 1 drop ginger essential oil
1 small cabbage, shredded, OR a 14-16 oz package coleslaw mix (cabbage and carrots)
2 green onions, chopped
1 c. cooked turkey or chicken, diced
1/2 c. cashews, optional

Heat 1 tsp. olive oil in a large skillet on high heat.  Break the Ramen noodles into small pieces and add to the hot oil.  (You won't need the flavor packet for this recipe.)  Stir dry noodles constantly for about 2 minutes, until some of the noodles start turning a toasty brown.  Remove from heat and set aside. 

In a medium bowl, combine remaining 2 tbsp. olive oil, vinegar, honey/sugar, salt, pepper, and ginger. Stir well to combine.  Add the cabbage or coleslaw mix, green onions, turkey/chicken, and cashews.  Stir thoroughly, until no puddle of dressing remains on the bowl's bottom.  Serve right away for the crunchiest noodles.  

0 Comments

Sweet Potato Curry with Turkey

11/28/2013

0 Comments

 
Picture
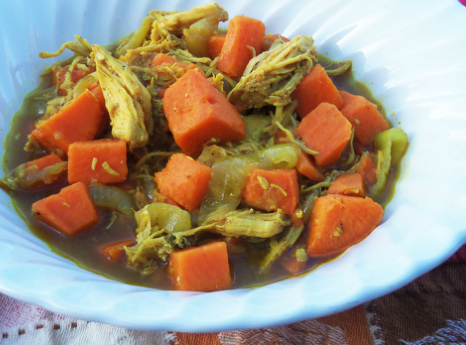
Curry is becoming known as a  bit of a superfood.  The spice blend's famous color is from one of its ingredients, turmeric.  Turmeric is now known to reduce inflammation- brain, systemic, and joints.  Here's a great way to use up some leftovers in a flavorful, healthy way!
Curry has an affinity for sweet, so it mixes perfectly with sweet potatoes or yams.

When I was in college, I lived in the cheapest off-campus apartment around.  There were several foreign students in the complex, and one day we had a potluck dinner together.  
One of the first foods on the table was an amazingly yellow... something.  So I asked what it was.  "Curry," she responded, "It's a food from Korea.". 
Further down the table was another bowl of yellow food.  I asked about it.  "Chicken Curry," she explained, "The Jamaicans invented it."  
Another friend walked up with a now-familiar color.  I asked. 
"Curry.  It's from Africa."

It was good.  All three were.  Good enough I could see why everybody claimed it was from their own native country.

Since my roommate was the Jamaican, that's whose recipe I got, though I had to watch her make it and estimate the amounts at the time.  This recipe is based on hers, though she used bone-in chicken thighs, less onion but added a couple green onions,  potatoes instead of sweet potatoes, and serve it not only over rice, but also with thick, chewy 'Jamaican Dumplings'.  The recipe is flexible.

Curry.  From America.

Sweet Potato Curry with Turkey- makes about 6 cups

2 Tbsp. oil
1-2 Tbsp. curry
2 medium onions, sliced into rings
1 c. cooked turkey, cubed (can use chicken instead)
1 lb. sweet potatoes, peeled and cubed*
1/2 tsp. salt
1/4- 1/2 tsp. pepper, to taste
water

*I used raw sweet potatoes, but feel free to use cooked ones- you can even get away with using leftover Thanksgiving baked sweet potatoes as long as they're not too saccharine; reduce cooking time accordingly.

Heat oil on medium-high heat until shimmering-hot.  Add the curry powder- amount depends on how strong you like it.  (I like it strong.)  Stir, and let it heat for about a minute to 'bloom' the flavor.  It's done when it starts to smell delicious and a little toasty. DON'T burn it.  (Nasty, bitter flavor!...)  Reduce heat to medium, add onion; cook until they are tender, stirring occasionally.  
Stir in turkey, then add sweet potatoes, salt, and pepper.  Add water until the food is nearly covered.  Put a lid on the pan and simmer, covered, for about 20 minutes or until just tender.  Remove lid, increase heat and gently boil until liquid is reduced by about half.  

Serve hot by itself or over rice.

Optional:sprinkle with any of the following:
chopped peanuts
green peas
mandarin orange segments
shredded coconut
diced apple
dollop of sour cream or unsweetened yogurt
chopped hardboiled eggs
bits of dried fruit

0 Comments

Free e-book! Cooking with Eggs- Omelets and Frittatas

9/20/2013

0 Comments

 
Picture
 Today I have a free e-book offer for you, a cookbook, “The Egg and I.” It has tons of recipes for making omelets and frittatas, along with great tips on mastering eggs in the kitchen.

It's just over 40 pages of recipes for all kinds of omelets plus pages of frittatas

You can get it here, and you'll get to choose from four formats: PDF, Microsoft Word, HTML, or Kindle. 

Here's what Dennis Weaver, the cookbook's author, says:

The difference between a frittata and an omelet is that the ingredients in the frittata are mixed into the eggs instead of folded into an omelet. Usually a frittata is started on the stovetop and then baked in the skillet in the oven. They are sometimes called flat omelets or farmers’ omelets. They are larger and cut into slices to serve.

This is not your ordinary e-Book!  It has 31 different scrumptious omelet recipes. Omelets you won’t find anywhere else plus more than $30 in recipe books. Plus it tells you how to make them and gives video instructions.  Start making omelets like a pro. You can 
eat them for breakfast, lunch, and dinner.  

The last time we visited my son and his family in Minnesota, we stopped at Keys Café in Saint Paul where I had “The Loon Omelet” which personifies how versatile an omelet can be. The Loon Omelet is made with wild rice, mushrooms, onions, tomatoes, Swiss cheese, turkey, and topped with a hot mushroom sauce.

You can even make a party out of omelets, or host the next family gathering with an omelet bar. You’ll learn how here.

Omelets are easy, you can make one in as little as five minutes. You can make American omelets, Italian omelets, puffy omelets, and Irish omelets; even an omelet casserole.

Breakfast at your house will never be the same.
0 Comments

Summery Fish and Vegetable Bake

9/2/2013

0 Comments

 
Picture
Can you tell it's zucchini and tomato season?  I've wondered before why so many recipes combine those two vegetables.  I now suspect that it's partly because the plain zucchini excels at tasting like whatever you cook it with, and very few things can top a fresh garden tomato in the flavor department.  This recipe also uses any mellow white fish, probably for the same reason.  The other ingredients both perk up and round out the flavor.  This one's a keeper.

Baked Fish and Vegetables

4 Tbsp. butter, softened
3 garlic cloves, minced
1 Tbsp. lemon juice
1 tsp. grated lemon zest or 2-3 drops lemon essential oil
1 lb. zucchini or summer squash,sliced 1/4" thick
1 lb. tomatoes (3 medium), sliced thin, OR cherry tomatoes, halved
1/2 c. minced fresh basil or 1 drop basil oil
salt and pepper
1 1/2 lbs. mild white fish 
2 Tbsp. white balsamic vinegar*

Preheat oven to 450 F and move an oven rack to the lowest position.  Mix together the butter, minced garlic, lemon juice, and zest.  If using basil oil, add it to this mixture.  Rub a little of the butter mixture on the bottom of a 9x13 pan.

Put the zucchini slices in the bottom of the 9x13 pan; add the tomatoes in a second layer.  Sprinkle with salt and pepper and with half of the basil (unless you used basil oil).  Pat the fish dry with paper towels, then place the fish on top of the tomatoes.  Dot the butter over the top, add the rest of the basil, and drizzle with the vinegar*.  Cover tightly with foil; bake about 20 minutes, or until the fish flakes when you twist a fork in it.  Serve immediately.

Serve over rice to pasta to soak up the delicious sauce!

*The original recipe, from America's Test Kitchen, calls for 1/4 cup dry white wine.  I don't cook with wine, so the white balsamic is what I found in my pantry to add the savory flavor.  Since it's strong, I used only half as much (2 Tbsp. instead of 1/4 c.).  If you have neither, chicken broth and a splash of soy sauce would give a similar depth.
0 Comments

Summer Pink Potato Salad

8/3/2013

0 Comments

 
Picture
About twenty years ago, a group of my neighbors got together for a "Summer Salad Social".  One of the more unusual offerings there was a salad from a friend from Argentina; she said it was a fairly common salad there- cubed cooked beets with cubed cooked potatoes.  This one is not a lot like hers- which wasn't even pink-- but that was the memory that sparked this salad's creation.  My husband says it's a keeper, especially since it was made using fresh-from-the-garden beets and potatoes.  The flavor is even better the next day.

Since there are children to feed here, I called it something else for my girls' benefit: "Princess Pink Potato Salad".   :)

If you live near me, I have lots of garlic chive plants to share!

Summer Pink Potato Salad

1 lb. beet bulbs, about 4 medium
1 lb. new potatoes, cubed, or halved if small
1 lb. summer squash, cubed
2 Tbsp. Italian dressing OR 1 Tbsp. balsamic vinegar
4 oz. ham or smoked turkey, diced
6 oz. mozzarella, cubed
a few sprigs of fresh thyme, or 1 tsp. dried thyme
1/4 c. garlic chives, chopped, OR a handful of chopped green onions and a sprinkle of garlic powder
1/4 c. mayonnaise

Bring about 2" of water to boil in a medium-large saucepan and add 1 tsp. salt.  Trim beets, leaving about 1" of stem on top.  Scrub and rinse, but don't peel them.  Let them cook, covered, in the simmering water for about 45 minutes, or until the largest can be pierced easily with a fork.  Remove beets, saving the water.

Add the potatoes to the water.  Simmer, covered, for 10-15 minutes, until tender.  Remove the potatoes using a slotted spoon, and put them in a large bowl.  Add the Italian dressing or vinegar, and toss gently to coat. 

Add the squash cubes to the water; simmer, covered, for 5 minutes, or until barely tender.  Pour into a colander and rinse in cold water to stop the cooking.

Add to the potatoes.  Now that the beets are cool, slide the beet skins off, then cube the beets.  Add to the bowl, along with the ham/turkey, mozzarella, thyme, and garlic chives.  Stir to distribute evenly, then add the mayonnaise, along with salt and pepper to taste.  Stir until everything is a beautiful pink.  Store any leftovers in the fridge, covered.
0 Comments

Individual Tamale Pies

6/25/2013

0 Comments

 
Picture
The sauce in this filling is from my great-grandmother, who I hear was an excellent cook. She lived in the ‘Mormon’ colonies in Mexico, left in 1912 to avoid Pancho Villa and other warring factions, returned after the Revolution, and earned money through millinery (making hats) and sewing.  Her last few years were in Arizona, where she cooked and sewed at the LDS Mesa temple.   This recipe was her enchilada sauce, only she used 3 cups of water and 3 Tbsp. chili powder when using it over enchiladas, since more liquid is needed for those.  

These are gluten-free if you use cornstarch and not flour in the filling.  Using shredded meat instead of burger makes these a little more authentic, but ground meat is awfully convenient.  Unless you happen to have some leftover roast available to shred.

Individual Tamale Pies 
Makes 12 muffin-sized ones, or can be made into a 9" pie pan

Crust:
2 c. masa harina  (OR use 1 c. cornmeal and 1 c. flour)
1/2 tsp. salt
1/4 c. coconut oil or other fat (oil, butter, lard, etc)
about 3/4 to 1 cup water

Preheat the oven to 400 degrees.  Mix all together to form a moderately thick dough.  Grease 12 muffin cups.  Shape a ball a little bigger than a ping pong ball (3 Tbsp. dough), then press dough in a muffin cup, making a layer about 1/4"- 3/8" thick.  Repeat until finished.  Set aside.  

Filling:
2 cups cooked burger or shredded beef, pork, or chicken
8 oz. can tomato sauce
2 Tbsp. butter, optional
1/2 tsp. salt
1 Tbsp. sugar
2 Tbsp. chili powder or to taste
1 Tbsp. cornstarch OR 2 Tbsp. flour

 Mix together the meat, tomato sauce, butter, salt, sugar, and chili powder, and bring to a boil.  Stir the cornstarch or flour into 1-2 Tbsp. water,  to form a slurry.  Gradually mix the slurry into the boiling mixture, cook and stir until thickened, about a minute.  Taste it and add a little more salt if you like.

Spoon 1/4 cup of filling into each of the lined muffin cups.  Bake for 15-20 minutes, until the crust is set and the filling just starts to bubble around the edges.  Let sit for a couple minutes, then remove them by placing an upside-down cookie sheet on top, then flipping the whole thing upside down (see slideshow below).  

Serve with plain or with shredded cheese, sour cream, chopped tomatoes, lettuce, or anything else that sounds good.


0 Comments

Almost Taco Salad

3/20/2013

0 Comments

 
Picture
Why is it almost Taco Salad?  Because there's no tostada or chips with it.  If you want full-blown Taco Salad, just add some.  Pretend they're corn-chip croutons.  I didn't use those because of a sudden urge to make roasted potatoes and didn't want a lot more carbohydrates in the meal.  Besides, if I opened a bag of chips, the whole thing would disappear, and that's anywhere from $1- 2.50, depending on if we're using cheap tortilla chips or Fritos.  The potatoes, as our carb, cost about $ .50 instead.  Yum.

Almost-Taco Salad

 ½ lb. ground beef
1 Tbsp. tomato powder
2 Tbsp. chili powder
Salt to taste
1 head of lettuce (or a half head each Iceburg and red leaf lettuce)
½ green bell pepper
½ red bell pepper
½ c. shredded cheese
1 tomato, cut in wedges
Optional: thin-sliced onion, sliced avocado, jicama cubes, cooked black beans, drained canned corn, canned green chilies....

Cook the beef until browned.  Meanwhile, wash and chop lettuce and veggies.  Put the lettuce in, then add the vegetables and most of the cheese; mix slightly.  When the burger is done, drain off grease, then add tomato powder and chili powder.  Stir to coat, taste and add salt if needed.  Spread out the meat on a plate to cool more quickly.    When it’s cool, top the salad with it and the remaining cheese.

My family thought it was good without salad dressing, but if you want something to drizzle on top, Ranch is a good choice- especially if you mix a little chili powder into it-, OR this:

Creamy Garlic Dressing:

¼ c. plain yogurt or sour cream
1 Tbsp. water or milk
½ tsp. garlic powder
Salt to taste
1/2 tsp. dried parsley, optional, if you want it to look prettier

Whisk until smooth.
Serve with oregano-roasted potato wedges and vegetable sticks.

0 Comments

Mermaid Delights (tuna burgers)

9/25/2012

0 Comments

 
Picture
A tuna burger- filled with savory ingredients and topped with melted cheese...  a slice of tomato and a slabs of pickle would be good here, but I didn't add them this time.

The original recipe for this came from a Better Homes and Gardens cookbook featuring kids' lunches.  They had two versions, the "Mermaid Delights" using shredded carrots and dried basil, and "Buccaneer Burgers" using canned corn and dried dill.  The idea is to stir in 1/3- 1/2 c. of some small bits of vegetable and 1/4 tsp. of an herb.   Feel free to come up with your own!  Canned salmon can be substituted for the tuna, if you like, as could about 4 ounces of any cooked fish.  If you like mayonnaise on burgers, tartar sauce would be a good replacement here.

The patties didn't turn out as large as the book's photos showed, and today it dawned on me why.  When the book was written, several years ago, a can of tuna weighed 6 1/2 ounces.  They've shrunk since then, down to 5 ounces.  I opened and drained two cans and weighed them to see how much actual meat was in there; each can held about 3 1/2 ounces tuna.  So there you go.  For larger patties, either just make three for each can of tuna you use, or make them thinner.

Mermaid Delights

1 (5 oz.) can tuna, drained
1 large egg
1/4 tsp. dried basil
dash of pepper
14 rich round crackers, crushed, OR about 1/3 c. dry bread crumbs
1 medium carrot, shredded
1/3 c. shredded cheese (you choose which kind)
4 slices of cheese (your choice)

4 hamburger buns (the ones above are homemade)
4 lettuce leaves
sliced tomato and/or pickles

Put tuna in a bowl and break into chunks.  Mix in egg, then basil, pepper, and crumbs.   Stir in shredded carrot and shredded cheese.  Turn on the oven broiler.
Grease a cookie sheet, then scoop mixture into four (or three!) equal piles on it.  
Shape into flat patties, about 3 1/2" across.  Broil about 4" from heat, for 4 minutes or until browned.  Either flip patties over and broil another 3-4 minutes, OR turn the oven to 375 degrees F and let them bake 10 more minutes.  

Top immediately with a slice of cheese, then assemble burgers with the buns, lettuce, tomatoes, and pickles.
0 Comments

Autumn Harvest Smoked Salmon Sandwiches

9/13/2012

0 Comments

 
Picture
Yeah, I know that smoked salmon is a little expensive for a website with a name like this one has...  

Would it help you feel better to tell you I buy it during the after-Christmas "food gift" clearance sales?   It's at least 50% off then.  

OK, it's still not real frugal.  But it does have an incredible shelf life-- and is one of my absolute-favorite foods!- which is why I had a couple tins of it on hand when the idea for this sandwich struck.  I decided, the day of the contest, to enter the "Fleishman’s Yeast Sandwich Bread Contest 2012" at the Utah State Fair.  Which bread I wanted to make was no problem, the Autumn Harvest Bread came right to mind.  The contest this year, though, specified for 10% of your overall judging score to be from the filling (or "description of a filling").  This is what I came up with to complement the breads' flavors.    It will make your tastebuds "dance and sing"!  The judges agreed, this took first place in the contest.

Autumn Harvest Smoked Salmon sandwiches

Start with one loaf of Autumn Harvest Bread, sliced about 1/2" thick.

* * * * * * * * * * * *

Cream Cheese Filling:
4 ounces cream cheese, softened 
2 Tbsp. very finely chopped (or pureed) red onion
2 Tbsp. minced crystallized ginger
2 Tbsp. finely chopped toasted pecans
¼ c. finely chopped celery
2 tsp. fresh lemon juice
1 ½ tsp. finely grated lemon zest
1/16 tsp. freshly ground black pepper

Stir together, chill at least 30 minutes to blend flavors. 

To assemble  sandwiches, spread about 2 Tbsp Filling on each of four slices of bread. Top with 2 ounces smoked salmon, and any of the following you like (I used all of them): thinly sliced red onion, sliced tomato, roasted red pepper, alfalfa sprouts, and arugula.  Drizzle with red wine vinegar and sprinkle with salt and pepper.  Makes 4 sandwiches.


0 Comments

Zucchini Cakes

9/4/2012

0 Comments

 
Picture

Who couldn't use another recipe for zucchini right about now?

This year I really HAVE seen cardboard boxes with a "FREE ZUCCHINI" sign written in permanent marker, along the side of the road.
As you can see, this we're not talking about zucchini CAKE... these are tender, flavorful pan-fried morsels, related to crab cakes.  Without the crab.  There's an endless variety of ways to make these, this particular batch has a Southwestern flair, served with a creamy cilantro-scented Lime Chipotle sauce.    We had them for dinner last night and had leftovers.  They would make a nice accompaniment to grilled chicken or beef, but I served them as a meatless main dish.  
This afternoon about 4:00 I suddenly remembered them again- and promptly finished off the last couple of them for a snack.  YUM! (Actually, I took a couple over to a neighbor, who immediately asked for the recipe.)

This is a pretty big batch, I think it made about eighteen 3-inch cakes.  Feel free to cut the recipe in half.  You can always make the full batch, though, and freeze extras.  Bake at 350 for 10-15 minutes to reheat and recrisp, or toast in a toaster oven.  See below for the recipe.

I got a plainer version originally from JustPutzing.com, though her version was tweaked from one on TheLife'sAmbrosia.com    
Neither one of those used corn.  I like it for the sweet flavor it adds, along with some non-squishy texture, but you can certainly leave it out.  If you do, you'll only need 2 eggs.
Feel free to add in different spices, use different kinds of cheese (the original used Parmesan, in half the amount), or serve with different sauces.  Ranch dip would be delicious.  So would honey mustard.    I intend the next batch to resemble crab cakes even more- I'll add Old Bay to them, a little finely-grated onion, add maybe a teaspoon of honey for a hint of sweetness, and serve with tartar sauce.
Picture
Southwestern Zucchini Cakes


1 lb. zucchini (3 small)
1 cup corn kernels (I used canned, then drained them well)
1 c. shredded mild white cheese (I used Havarti 'cause I found it for $2/lb)
2 Tbsp. salsa if you have it around  (OK without but good for color)
1 cup panko bread crumbs (or other crumbs- bread, cracker, gluten-free, etc)
1/2 tsp. salt
2-3 tsp. chili powder (to taste)
3 medium to large eggs, beaten
3-4 Tbsp. cooking oil 


Shred the zucchini on fine or medium holes.  Grab a handful, hold it over a plate or bowl, and squeeze hard to remove excess liquid.  Put the squeezed zucchini in a mixing bowl, and repeat with all the zucchini.
Stir in the corn, cheese, salsa, bread crumbs, salt, and chili powder.  Taste and add more of whatever you think it needs.  Stir in the eggs, cover, and refrigerate for 20-30 minutes.   (You can skip this step, but this gives the mixture time to bind together, as the egg soaks into the crumbs.  This makes them much easier to form and flip.  While it chills, make the sauce below.)
Heat a skillet over medium heat.  Add 1 Tbsp. oil to it.  When oil is nearly smoking, scoop 3-4 Tbsp of the zucchini mixture into the pan, then flatten to about three inches across.  Repeat with as many as will fit in the pan with about 1" between them.  Cook for 4-5 minutes, then flip over.  Cook for another 2-3 minutes, until golden.  
Add another tablespoon of oil to the pan before starting the next panful.

Makes about 18.   Serve warm or room temperature.

Creamy Chipotle Sauce (adapted from America's Test Kitchen)

Note: Chipotle is smoked jalapeno pepper.  I don't have any on hand, so I came up with a similar flavor  with what I DID have, though it wasn't nearly as hot.  If you like more heat, add a little cayenne or red pepper flakes.  If you happen to have canned chipotle around, use 1-2 tsp., minced, in place of chili powder and Liquid Smoke)

2 Tbsp. mayonnaise
2 Tbsp. sour cream (I didn't have this, either- use plain yogurt, or like I did, thick kefir)
1-2 tsp. chili powder (to taste- my kids were happy with just 1 tsp.)
1/4 tsp. garlic powder, or one minced clove fresh garlic
2 drops Liquid Smoke
2 tsp. minced fresh cilantro
1 tsp. fresh lime juice
2 drops lime essential oil if you have it

Stir together.  Cover and refrigerate about 30 minutes to blend the flavors.
Makes about 1/4 cup.

If you double the recipe, you can have leftovers to change into a fabulous salad dressing: Thin down with a little water or lime juice.  Salt and pepper to taste.
0 Comments

Simple Marinara Sauce

9/1/2012

1 Comment

 
Picture

What is marinara sauce, you ask?

Call it spaghetti sauce.  Or a dip for fried mozzarella cheese sticks, breadsticks, or calzones.  It's a sauce for pan-fried cutlets.  Or pizza sauce.   It's just a spiced, meatless red sauce.   Stir in some cooked hamburger to make a meaty spaghetti sauce, or simmer meatballs in it until they're tender.   Try it instead of mayonnaise and mustard on a sandwich, on seafood, or over some grilled slabs of zucchini.  It's very versatile, and very easy!
Do you want all fresh ingredients, or all pantry ingredients?  Take your pick!  This is especially delicious if you use fresh garden tomatoes.

If using fresh herbs, you’ll need three times as much, i.e., 3 tsp. (1 Tbsp.) fresh oregano leaves.  

Marinara Sauce

    14-oz can crushed or diced tomatoes, OR 2 (8 oz.) cans of tomato sauce, OR 1 lb. pureed, or peeled and chopped fresh tomatoes
  1 (6-8) oz can sliced mushrooms, or 4-8 oz. fresh (optional but adds depth and ‘umami’)
  1 tsp. dried oregano leaves
  1/2 tsp. each thyme and basil, if you have them
  1/4-1/2 tsp. garlic powder (or 1-4 minced garlic cloves)
  pepper to taste


Stir everything together, simmer for 15 minutes if you want the flavors to blend well.

You can also add a dash of cayenne, or red pepper flakes, Tabasco sauce or whatever else smells good with it.  I like to add a few crushed fennel seeds to it because it adds to the aroma.  The cafeteria I worked at in college made it that way...

1 Comment

Chow Mein or Lo Mein

8/29/2012

0 Comments

 
Picture
Which one you make depends on the noodles you use.  What's pictured is technically neither, but is what I grew up calling 'chow mein'.  I think if you add the chow mein noodles, that then it is.  "Mein" means 'noodles', "lo" means "tossed", and "chow" means "fried.  Got it?   However you make the veggies & sauce, you can serve it with rice, cooked noodles, or fried noodles.    A package or two of Ramen works here, too: cook it for Lo Mein, or crumble the uncooked noodles and serve them as a crunchy topper.

During my senior year in high school, it occurred to me that I'd soon be in charge of feeding myself, and recipes would sure come in handy.  I asked my mom if she would compile her recipes for me, as a graduation present.   

She did it: a plastic 3x5 card file box filled with recipes for what we'd eaten most often during the past couple decades.  She must have typed during the day while I was at school; I don't remember seeing her work on it.  She fit it inbetween raising seven children, tending a huge garden, canning, two preschoolers still at home, serving on our town's volunteer fire department, and taking EMT classes. And then she typed them all up again for the next siblings to graduate.  Only that time, she bought a computer!

We didn't have a computer that first time around.  Mom typed every one of those recipes, inserting each card by hand into just the right spot in the typewriter.  Every now and then, a card has a little bit of White-Out on it underneath a letter.  You can't buy a cookbook as valuable as that. 

Some recipes were more about instruction than quantity.  This is one of them.  My addition to it are what's in parenthesis.

Chow Mein

Take any cooked meat that is chopped or ground (1-2 cups, burger, beef, chicken, turkey, pork, crab...).  Chop about a cup of celery (2 stalks) and cook in about 2 cups of water (simmer in a skillet).  Drain liquid from a (14 oz. or bigger) can of Chinese vegetables and add to celery.  Make this thick with about 1/4 c. cornstarch which has been made into a paste then gradually added to celery and water (mix 1/4 c. water with the cornstarch until smooth, then stir into the vegetables).  Cook (boil) until clear, stirring often.  Add cooked meat, vegetables and heat well.  Add soy sauce to taste.  Serve over hot rice and sprinkle with chow mein noodles.

A little ginger is good in this, as is 1-2 Tbsp. vinegar with 2-3 Tbsp. brownYou can add any other vegetables you like when cooking the celery... the version in the photo used a cup or two of diced & peeled watermelon rind, plus a handful of baby carrots, sliced,  that had started to dry out.  Chow Mein is like soup that way:  see what vegetables are starting to go, or random bits sitting around, and add them right in!  
0 Comments

Refried Beans, plus Bean and Cheese Burritos

7/27/2012

1 Comment

 
Picture
This recipe makes a big batch, about 11-12 cups (5 pounds) of refried beans.  The point is to have enough to freeze for later.  Since I buy beans in 25-lb bags for about $17, the beans for this cost just $1.40, a big onion was $ .30.  Not counting the spices – which are a small amount- this adds up to just under $ .08 for each half-cup serving of refried beans!  I used them to make some burritos to freeze for my husband’s lunches.

You can make these fat-free, but I prefer to use at least some fat, for a few reasons.  One is that it helps in digestion- fiber is easier on your system when there’s some fat there to help it along.  Another is that it helps make certain vitamins available- vitamins A, D, E, and K are fat-soluble, which means if you don’t eat fat along with those vitamins in your food, your body is not able to absorb them.  Besides all that, fat helps you stay full longer, plus helps the beans taste more moist and delicious!

According to CalorieCount, a half-cup of these -before the cheese- have 3.7g fat, 15g fiber, 21g protein, 27% of your RDA for iron, plus are high in magnesium, potassium, and thiamin.  How’s that for cheap, filling nutrition?

5 cups dry beans (about 2 lbs) – I used black beans but pinto are also good
1-2 onions, coarsely chopped
9 cups water

Sort through the beans and remove any dirt or rocks.  Rinse them, then put the beans, onion, and water in a pressure cooker.  Put the lid on and bring up to pressure.  Cook on high pressure for 45 minutes.   Let the pressure drop completely before opening up.  

If you don't have a pressure cooker, put the beans and onion in a big pot, cover with about 3 quarts of water (12 cups), bring to a boil, and simmer for about 4 hours.  Check occasionally to make sure there's still enough water to barely cover the beans, adding more if needed.

You’ll have about 12 cups of cooked beans.  Drain them but keep the liquid.  Stir in:
2 tsp. chili powder
2 tsp. salt
½ tsp. liquid smoke
¼  c. coconut oil – OR use bacon drippings and omit the liquid smoke

Puree or mash them - I put 3 cups at a time in my blender.  Add a little cooking liquid if they’re too thick.  They WILL thicken some as they cool.  Taste them and add more of any seasoning you think they still need.  This version is lightly flavored.

To make bean and cheese burritos, stir in 4-8 oz. mild or medium cheese, shredded on the biggest shredding holes.

If you’re making 6-oz burritos, you’ll need about 24 flour tortillas (size about 8” across). If you want 4-oz burritos, you’ll need about 40-48 tortillas.
1 Comment
<<Previous

    Need a Search bar?
    One day I may upgrade my website-- but until then, use your web browser search bar. Type in my web address and what you're looking for, like this-- 
    www.theprovidenthomemaker.com  pumpkin --  and you should get results.


    Author

    I'm a disciple of Christ, a member of the Church of Jesus Christ of Latter-day Saints, a family-defending, homemaking, and homeschooling mom of eight children, two of whom sometimes can't have milk or wheat. Growing up on a farm in a high mountain valley, my parents taught me to 'make do', work hard, smile, and help others.  I love cooking, learning, growing food and flowers, picking tomatoes, and making gingerbread houses --which CAN be made allergy-friendly-- with my children.  I hope you find something to help you on my site!

    Archives

    April 2024
    July 2023
    April 2022
    September 2021
    March 2021
    December 2020
    April 2020
    March 2020
    February 2020
    January 2020
    December 2019
    November 2019
    October 2019
    September 2019
    August 2019
    July 2019
    June 2019
    May 2019
    April 2019
    January 2016
    November 2015
    October 2015
    September 2015
    March 2015
    February 2015
    November 2014
    October 2014
    September 2014
    August 2014
    July 2014
    June 2014
    May 2014
    April 2014
    March 2014
    February 2014
    January 2014
    December 2013
    November 2013
    October 2013
    September 2013
    August 2013
    July 2013
    June 2013
    May 2013
    April 2013
    March 2013
    February 2013
    January 2013
    December 2012
    November 2012
    October 2012
    September 2012
    August 2012
    July 2012
    June 2012
    May 2012
    April 2012
    March 2012
    February 2012
    January 2012
    December 2011
    November 2011
    October 2011
    September 2011
    August 2011
    July 2011
    June 2011
    May 2011
    April 2011
    March 2011
    February 2011
    January 2011
    December 2010
    November 2010
    October 2010
    September 2010

    Categories

    All
    Alcohol
    Alternate Cooking
    Appearances
    Apple
    Apricots
    April Fools
    Aprons
    Bananas
    Beans
    Beef
    Beets
    Bench
    Beverages
    Bonnet
    Bread
    Breakfast
    Budget
    Budgeting
    Cake
    Candy
    Canning
    Carrots
    Cheese
    Chicken
    Children
    Chocolate
    Christmas
    Cleaning
    Coconut
    Comfrey
    Common Core
    Constitution
    Cookbook
    Cookies
    Cooking Oil
    Crafts
    Dairy Substitutions
    Dehydrating
    Dessert
    Dried Fruit
    Earth Oven
    Earthquake
    Easter
    Edible Weeds
    Eggs
    Emergency Prep
    Essential Oils
    Faith
    Family Home Evening
    Fertilizing
    Food Storage
    Fourth Of July
    Freezer
    Frosting
    Fudge
    Garden
    Gardening
    Gingerbread
    Gluten
    Gluten Free
    Gold
    Government
    Grains
    Gratitude
    Hat
    Herbs
    Home Remedies
    Home Repairs
    Homeschool
    Home Storage
    Honey
    Hope
    Inflation
    Leftovers
    Legumes
    Lemon
    Main Dishes
    Mixes
    Mothers
    Noah
    Non Artificial Colors
    Non-artificial Colors
    Nuts
    Oats
    Oil
    Orange
    Paint
    Peaches
    Pear
    Pie
    Pizza
    Plums
    Poem
    Popcorn
    Pork
    Potatoes
    Powdered Milk
    Prayer
    Preparedness
    Projects
    Prophecy
    Pruning
    Pumpkin
    Quick Bread
    Rhubarb
    Rice
    Salad
    Salt
    Sauces
    Self Reliance
    Self-reliance
    Sewing
    Shelf Life
    Shelves
    Sky
    Smoothie
    Snacks
    Soup
    Spices Or Seasonings
    Squash
    Strawberries
    Substitutions
    Sugar
    Summer Fun
    Three Month Supply
    Time
    Tomatoes
    Trees
    Truffles
    T-shirts
    Tuna
    Ultra Gel
    Valentine\'s Day
    Vegetables
    Water
    Watermelon
    Wheat
    Work
    Year Supply
    Zucchini

    RSS Feed

Web Hosting by iPage